You start with one square the width you want your finished (see note at end of post) flying geese unit to be plus 1 1/4" and four squares that are the height of the finished unit plus 7/8".
 On these smaller squares you need to draw a diagonal line on the wrong side of the fabric - you can use anything you like here, pencil, pen etc.
I love using the quick quarter ruler to mark my diagonal lines. On these smaller squares you need to draw a diagonal line on the wrong side of the fabric - you can use anything you like here, pencil, pen etc.
Next, with the right sides of the fabric together you place two of your ruled smaller squares on the larger square as in the picture below. They will overlap slightly.
I like to pin them as illustrated to keep them steady.
Next, you sew a scant 1/4" seam either side of the line you have drawn.
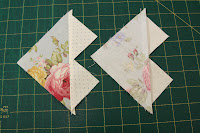
The next step is to line up another small square on the large triangle and again sew a scant 1/4" seam on either side of your line.


Last step! Press the seam towards the smaller triangle. Congratulations, you have a completed flying geese unit!


Now all you have to do is trim the little triangles off. In the photo above I have trimmed 3 and left the one in the top right hand corner so you could see what they look like untrimmed.
A note on the measurements: The "finished" measurement is what you want the unit to measure after it is sewn into your quilt or project. For example, I wanted the flying geese pictured above to measure 3 3/4" wide by 2" high when sewn into the quilt, so raw they are 4 1/4 across and 5.5" high. I hope this makes sense.


No comments:
Post a Comment
I'm glad you popped by, your comments really make my day.