This year I have joined OPAM hosted by Peg and Kris in the hope that I will be more motivated to completely finish all of the projects I have stacked up in the Tardis. So far, so good. I have finally knocked the Amy Butler Weekender Bag on the head and this week I finished off this little cutie.
It is a table runner for my daughter's room to go with a quilt that is still languishing borderless in the to-do box.
I made it using this the Easy Angle ruler by Sharon Hultgren - a great little tool for making half square triangles from strips rather than squares. I used the left overs from my Bliss Jelly Roll and some Moda Bella solid.
Mum quilted it for me with CCs in the pinwheel blocks and a leafy motif in the setting triangles.
It is my first time binding something that wasn't square and I used this tutorial from Heather Mulder Peterson for guidance. I also decided to include some ric-rac in the binding because you just can't beat it for cuteness!
I have a couple of projects set for completion in Feb - not least putting the finishing touches on my little tenant. It is going to be a big month!
Head on over to Peg or Kris's blog to check out what other industrious peeps have been up to.
Monday, January 31, 2011
Sunday, January 30, 2011
Adoption
This is Kuta.
He's very handsome isn't he? He is not actually our cat. He just thinks he is. About a year ago we did get a cat, her name is Lizzie (but that is for another post).
Back to Kuta.
About 3 months ago he started just passing through our backyard. Then he started to hang around and do pussy things - climb trees, play with our cat. Before long he was venturing inside and helping himself to the kitty buffet in our kitchen.
We began to have concerns that he was the unfortunate victim of a deceased estate nearby, but after some investigation we discovered that, no, Kuta belonged to a perfectly good family 2 doors down. (This is how we discovered his name - previously we had been referring to him as Gandalf the Grey).
Now it is common knowledge that cats are stealthy and I can attest to this as the latest development in the not-so-hostile takeover of our family has been playing out over the last couple of days. Kuta has been sneaking in to our house at about 6pm, hiding in my wardrobe only to present himself on the bed at about 2am. As he wears a little bell around his neck this has scared the crap out of me!
He is currently on our lounge watching ABC kids with our daughter. Operation infiltrate complete.
Has this every happened to anyone else?
Do cats just decide where they are going to live?
Imagine what he'd be like if we encouraged him with food?
Do cats just decide where they are going to live?
Imagine what he'd be like if we encouraged him with food?
Monday, January 24, 2011
Liebster Blog Award
I am feeling the love this week. Joan of CaliQuilter has given me the Liebster Blog Award - thanks Joan! This is a way of recognizing small (yet deliciously entertaining) blogs with under 300 followers.
In turn, once awarded you pass on the award to three blogs that you enjoy thereby spreading the love....so here are my Liebster winners. I hope you enjoy them as much as I do.
Friday, January 21, 2011
Amy Butler Weekender Bag - Done!!
Well the Amy Butler Weekender is done! And like many things that you build up to frighteningly insurmountable proportions in your mind - it wasn't bad at all. In fact, I loved making it.
Here it is in all it's glory....
Ready to be packed and taken to hospital.
I read many blogs about making this bag before I started and on the advice of many other "Weekender Warriors" decided to add some inner pockets. For the zippered pocket I followed this fantastic tutorial at U-handbag.
For the pocket below I just used the outer pocket pattern, lined it in black and reinforced it with the sew in interfacing. For the finish along the top I used the same method as for the outer side pockets. I divided the pocket into two with two rows of stitching about 1/8th of an inch apart.
I was so in lurve with my AB bag that I decided I needed a matching toiletries bag. Voila!
So, in review here are what I consider the pros and cons of this challenging pattern and my hot tips for successful sewing.
Pros - The pattern is really well written and when it is finished it is a lovely bag that will hold heaps. For the photo shoot I packed it with 7 bath towels, a hand towel and two face washers. Now that's a lot of manchester for one bag!
The timtex can be very difficult to manoeuvre through the machine but the lovely stiffness of the the finished product is worth it.
Cons - it is a very expensive bag to make. If I made it again I wouldn't use Amy Butler fabric for the lining; I'd go for something like a cotton drill in a plain colour.
The cutting takes a long time.
It can be physically very difficult to coax the bag through the machine. I had very sore shoulders for several days after finishing the project. But no pain, no gain right?
Tips - These items could make your Weekender Bag experience much easier. They did for me.
The pattern calls for you to sew the many layers (in some cases over 6) together with a zipper foot. Craziness!!!! I don't know how anyone would even attempt to make this bag without a walking foot to help you evenly sew through all of those layers.
I also found using the binder clips to be a winner when in the final construction stage of the bag.
Finally, I attached a magnetic fabric guide to my machine mark the 1/2" seam allowance. This gave me something to butt the fabric hard up against and kept my seams nice and even.
For other blogs featuring awesome weekender bags check out
http://notquitevintage.typepad.com/not_quite_vintage/2007/03/for_dawns_weeke.html
http://jenandfranz.blogspot.com/2010/06/amy-butler-weekender-bag-part-3.html
http://marynannasews.blogspot.com/2010/05/thank-god-for-sallies.html
http://www.madebybird.com/4-weekender-bags-in-4-weeks/
As for the swearing....I have to admit to letting about 6 magic words fly during the construction of this bag. And they were all of the type that would make a sailor blush.
Monday, January 17, 2011
Good Gravy!
Several months ago I made this quilt from Minnick and Simpson's Bar Harbor line....
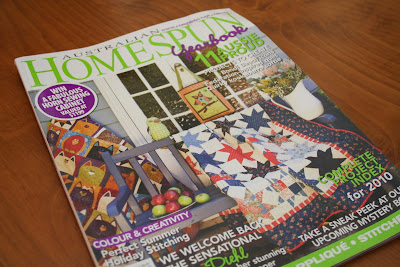
And this month it is featured in the lovely Homespun magazine.....
Scarily, the magazine also features a personal profile. It was very daunting getting a photo done that would be seen by thousands of people around the country if not the world. I had to call for the heavy artillery and crack out the war paint and the hair straighteners for the occasion. Don't be alarmed dear reader, I didn't let go of my true self - not that you can see them but I am wearing pajama bottoms in the photo!
A huge thanks need to go to Catherine and the team at Homespun for doing such a lovely job with the photo shoot of my quilt, converting my pattern for the magazine and the text in my profile. You are truly a pleasure to deal with and it is a real thrill to see my work in such and esteemed magazine.
And if not for my project you really should check the magazine out because this month it features a gorgeous project from Roslyn Mirrington of Bloom. You can see the project on her blog. Lovely, isn't it? I am pretty keen to make it. I am thinking of something in red and white and linen.
But for now I have to rejoin my daughter who is busy with her making box. An unattended 3 year old with glue is never a good idea. I thought you might enjoy a sample of her work....
What that girl can do with a feather!!
Saturday, January 8, 2011
Cover me. I'm going in!
After about 18 months of procrastination and general task avoidance I have decided to finally put my Amy Butler Weekender bag together. I have finished cutting everything out (a Herculean effort in itself) and have even made the handles and some of the piping.
I have read on many blogs that the bag is a bit of a demon but I would really like to have it finished to take to hospital with me next month. To be perfectly honest I am less nervous about having a caesarean than I am about making the bag!
My plan is to tackle it slowly, one step a day, so that in a week I will hopefully transform these fabrics.....
Into this bag.....without any swearing.
I think I could be kidding myself.
Subscribe to:
Posts (Atom)